我的一些工作小技巧 (Mac系统)

最新版本的Shell脚本可从GitHub中获取
切换公私 Git 环境:SSH 秘钥与 Git 用户信息
在使用同一台电脑进行公司项目的工作,下班后进行自己项目的工作时,往往需要区分使用公司 GitHub 账号与私人 GitHub 账号,并且需要切换 Git 中的用户信息。
通常我们使用 SSH 与 GitHub 进行连接访问,在 .ssh 目录中 config 文件有如下配置:
1 | Host github.com |
如果公司比较贫穷,没有购买 GitHub 企业账号的话,就会存在同一个 Hostname 需要配置不同秘钥的情况,而在 config 文件中不能同时配置多个相同 Hostname 的项。
假设我们 SSH 中已创建好 id_rsa_company 与 id_rsa_personal 两个秘钥,并分别在各自 GitHub 账号中完成配置。
此时我们创建一条命令 ssh2me,实现一键切换公司账号与私人账号环境,主要切换内容是更换 SSH config 配置的秘钥,以及 Git 中配置的全局用户信息。
ssh2me 命令脚本如下(需要自行替换 Git 用户信息):
点击展开
1 |
|
将脚本命令化并复制到系统中:
1 | chmod +x ssh2me |
使用方式:
1 | ssh2me # 显示当前配置的用户信息 |
一键创建 Android 项目模板目录
在我新创建的 Android 项目中,需要统一创建一套用习惯的目录结构,为了避免每次手动创建一堆目录的重复工作,现在将这些任务编排为 shell 脚本形式,在 Bash 中一键生成即可。
我想在每个项目中都创建这样的目录结构:
1 | . |
编排成 Shell 脚本:
点击展开
1 |
|
将 Shell 脚本文件命名为 deployDirs,并执行以下指令将该脚本命令化:
1 | chmod +x deployDirs |
Live Templates
Android Studio 中的 Live Templates 功能支持自定义关键词,当输入指定关键词时,IDE 会识别并提示可快速替换为指定的模板代码。
以下按 Live Templates 中各个小节列出我的自定义模板。
从各个 配置文件 中 Ctrl + C / V 复制并粘贴所需段落到 Android Studio 的设置中对应的小节里即可
AndroidCompose 小节
__配置文件__- remu:生成 remember { mutableStateOf($PARAM$) },摘抄自朱凯老师
- modi:生成 modifier = modifier,用于 @Composable 函数的参数快速填充
- Modi:生成 modifier = Modifier,用于 @Composable 函数的参数快速填充
- compre:生成自定义 @Composable 函数和对应的 Preview 函数,模板代码应用后写上自定义的函数名即可
- compre filename:生成自定义 @Composable 函数和对应的 Preview 函数,自动使用当前文件名作为函数名,例如创建的文件名为 ConfirmButton.kt 时,函数名自动命名为 ConfirmButton
- screen:生成自定义 Screen 类型 @Composable 函数、Content 函数和对应的 Preview 函数,模板代码应用后写上自定义的 Screen 函数名即可
- screen filename:生成自定义 Screen 类型 @Composable 函数、Content 函数和对应的 Preview 函数,自动使用当前文件名作为函数名
AndroidKotlin小节
__配置文件__- invoke:生成 suspend operator fun invoke()
AndroidLog 小节
这部分是 Java 版本的 Log 相关
__配置文件__- logx:生成 Log.e(“xxx”, “$METHOD_NAME$: $content$”, $exception$);
- logxe:生成 Log.e(“xxx”, “$METHOD_NAME$: $content$”, new Exception());
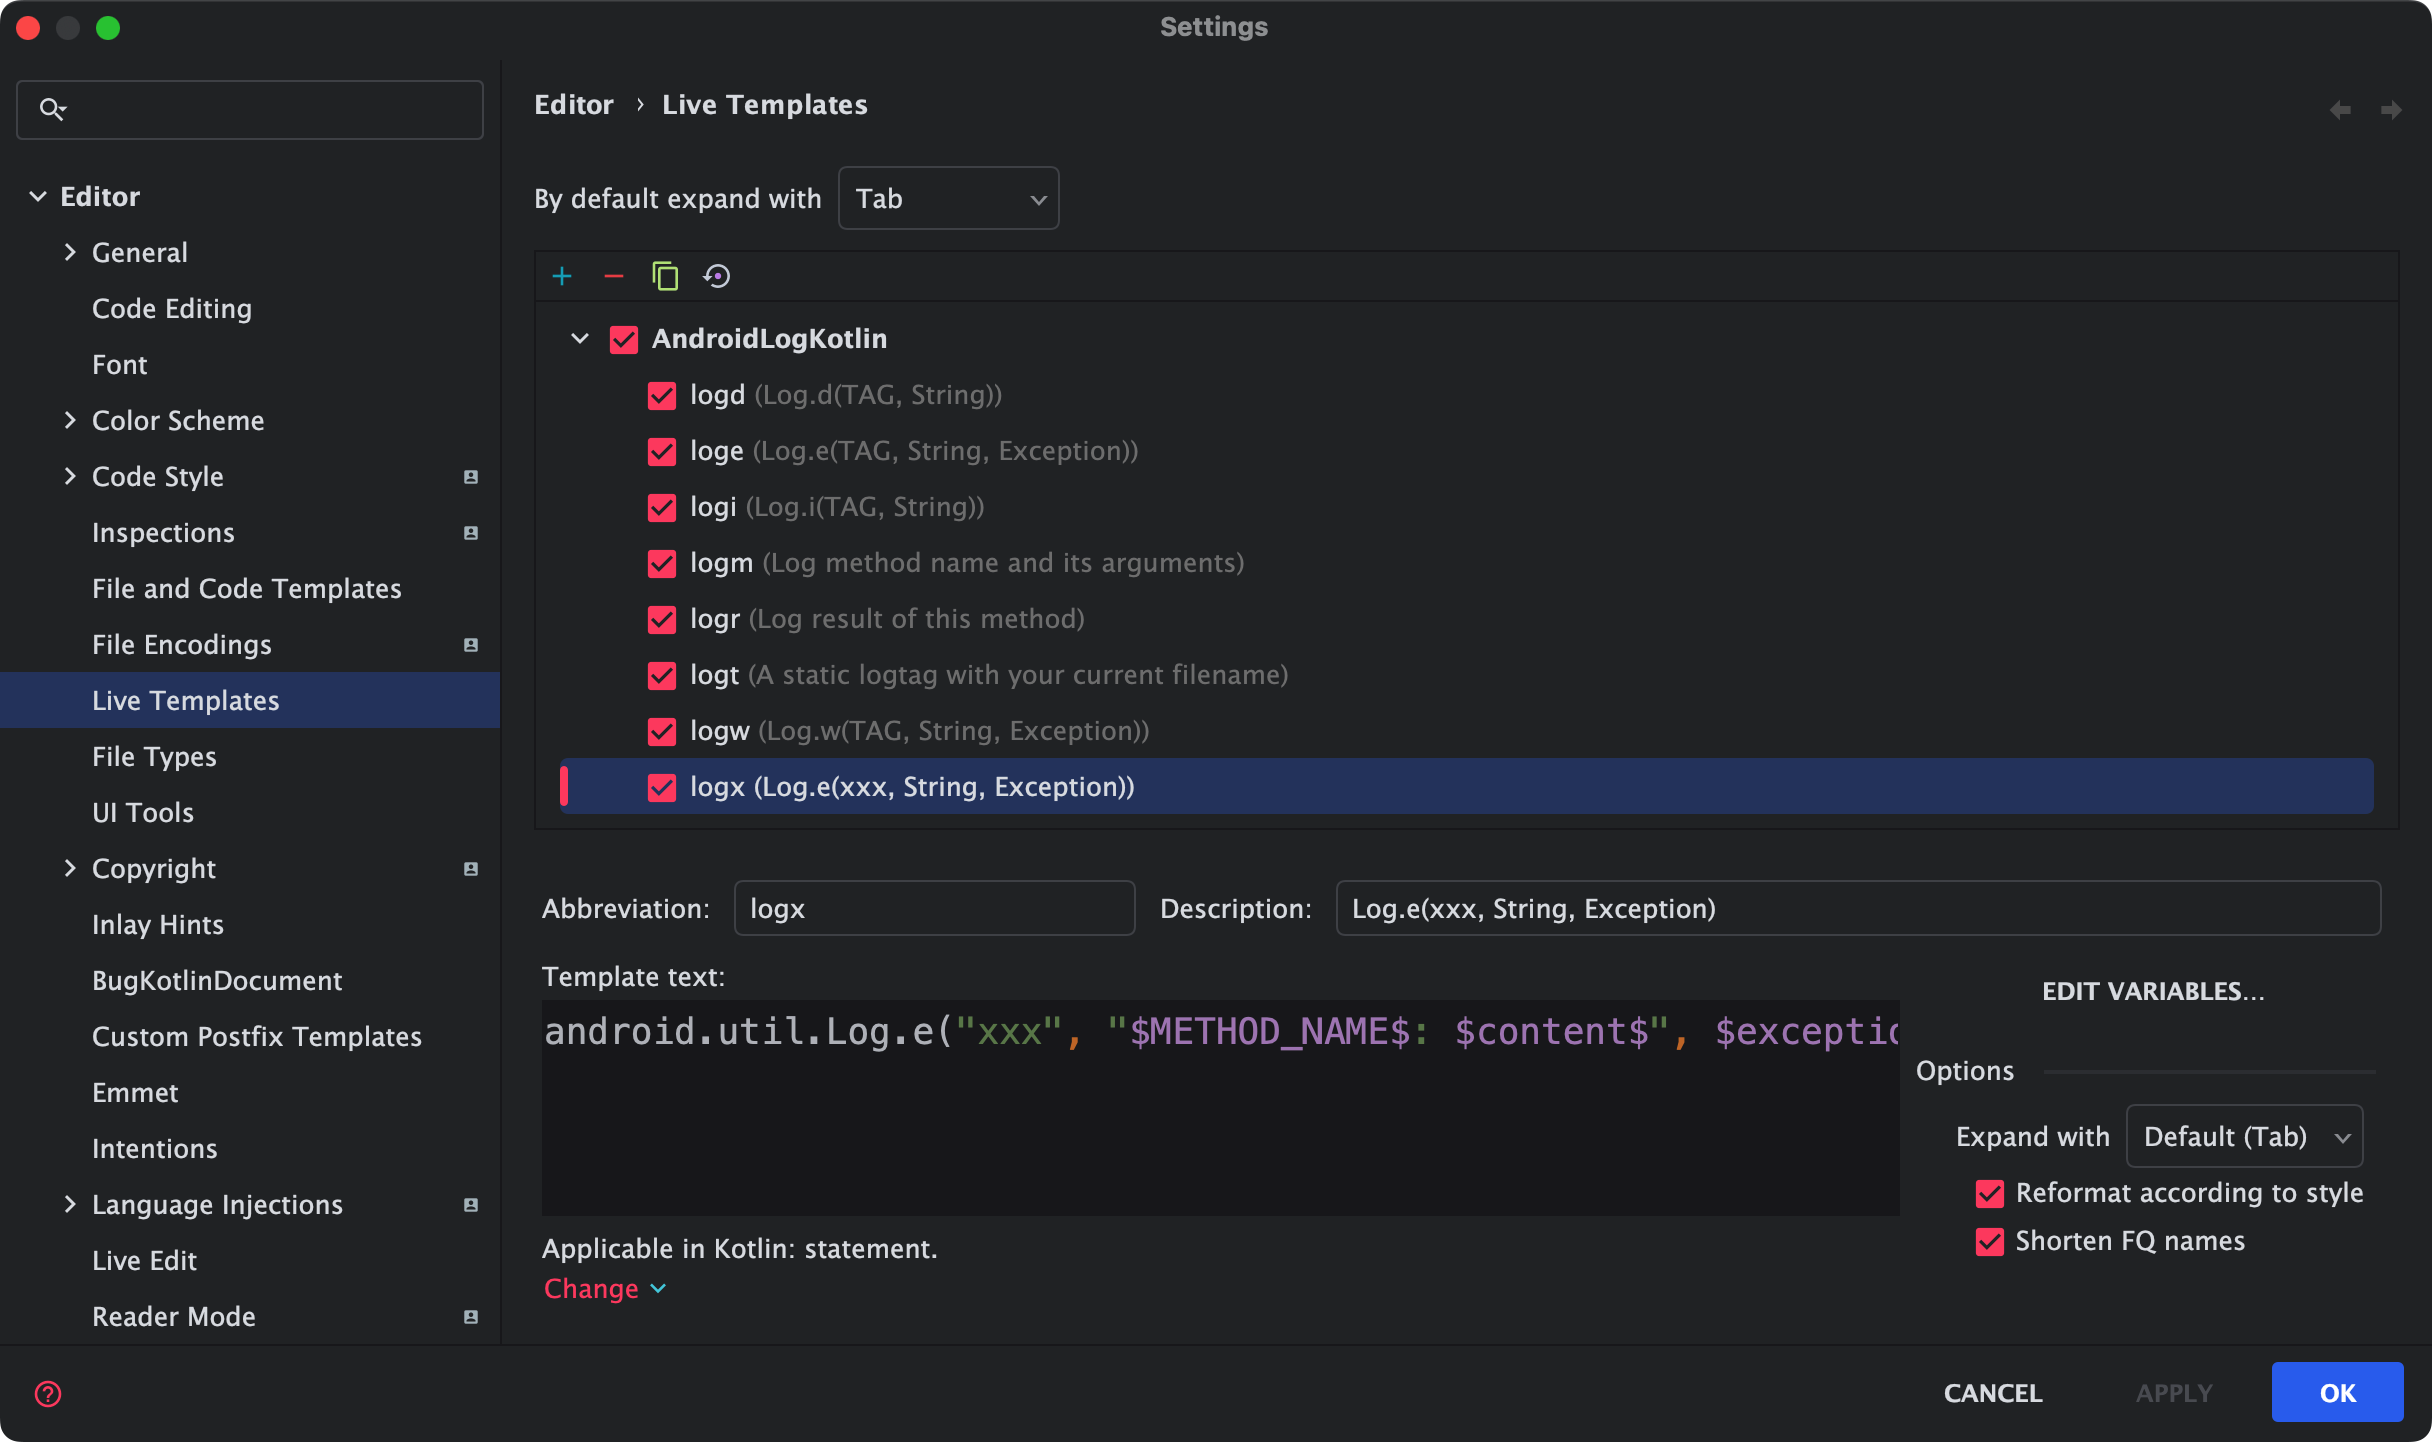
AndroidLogKotlin 小节
这部分是 Kotlin 版本的 Log 相关
__配置文件__- logx:生成 Log.e(“xxx”, “$METHOD_NAME$: $content$”)
- logxe:生成 Log.e(“xxx”, “$METHOD_NAME$: $content$”, e)
- logxt:生成 Log.e(“xxx”, “$METHOD_NAME$: $content$”, t)
- timx:生成 Timber.tag(“xxx”).e(“$METHOD_NAME$: $content$”)
- timxe:生成 Timber.tag(“xxx”).e(e, “$METHOD_NAME$: $content$”)
- timxt:生成 Timber.tag(“xxx”).e(t, “$METHOD_NAME$: $content$”)
Postfix (Kotlin)
Android Studio 中的 Postfix 功能支持以自定义后缀的方式,快速生成完整的代码结构。
但是当前 Android Studio 不支持自定义 Kotlin 的 Postfix,需要通过插件 Custom Postfix Templates 来实现。
插件安装完成后,可在设置中导航至该插件设置部分:
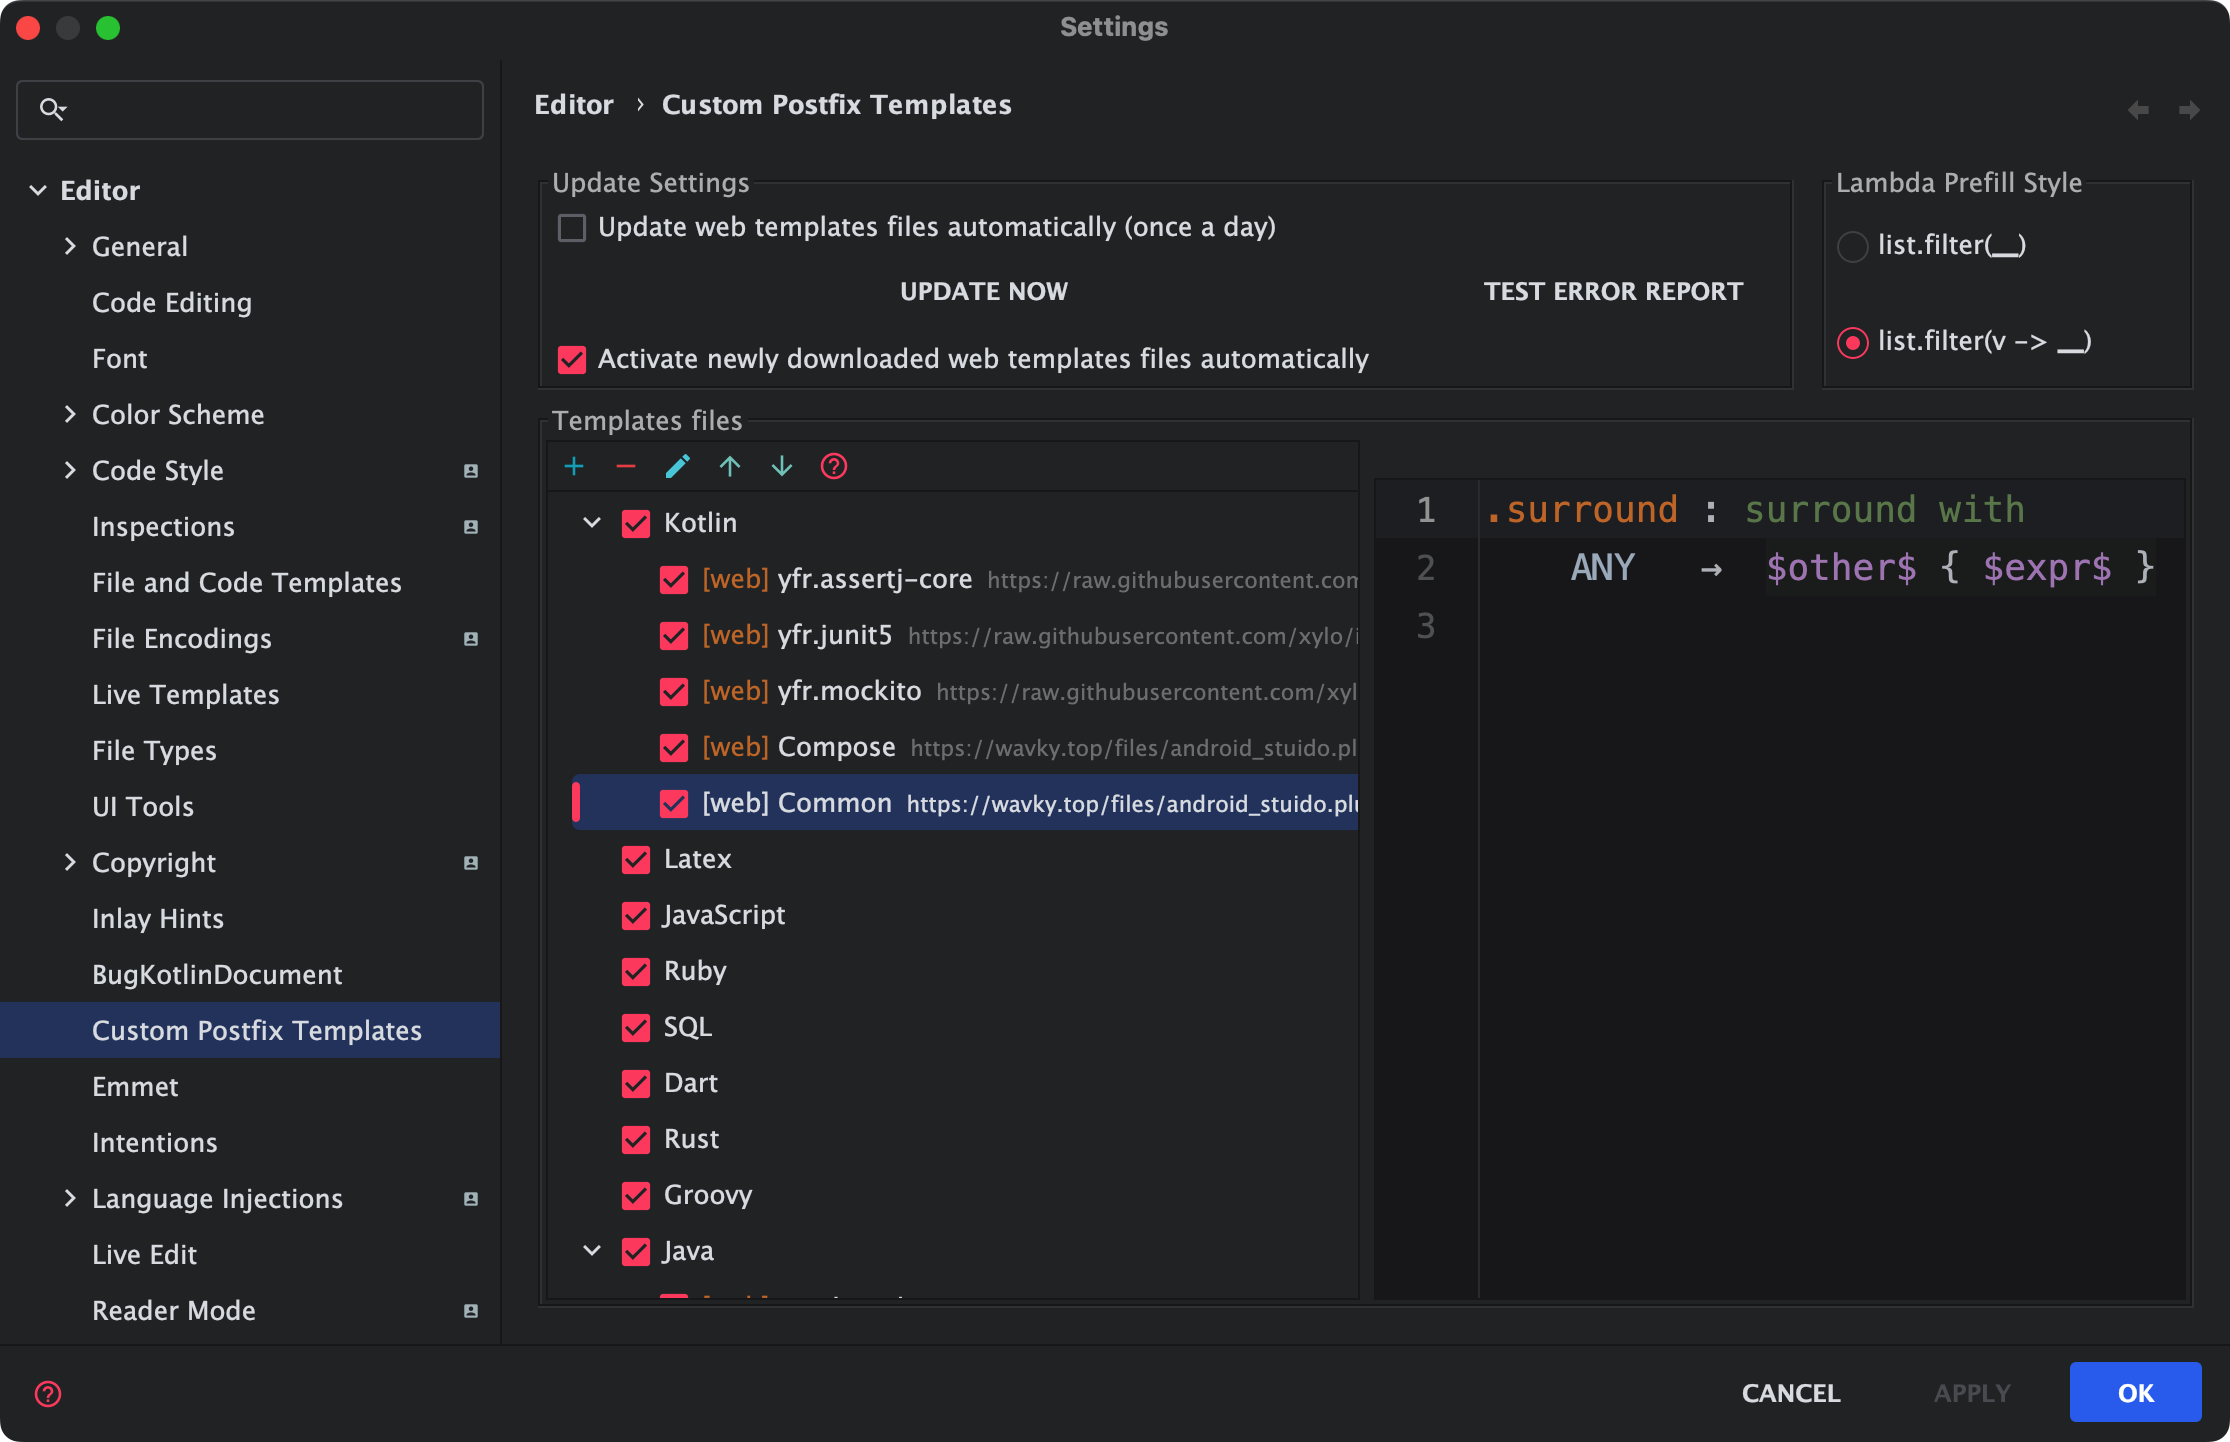
(也可通过顶部 Tools 菜单中 Custom Postfix Templates 子菜单进入)
使用方法
以上图为例,自定义了一个 surrund 模板,在输入 val result = api.request().surround 时,点按回车会自动转换为以下形式:
1 | val result = <光标位置> { api.request() } |

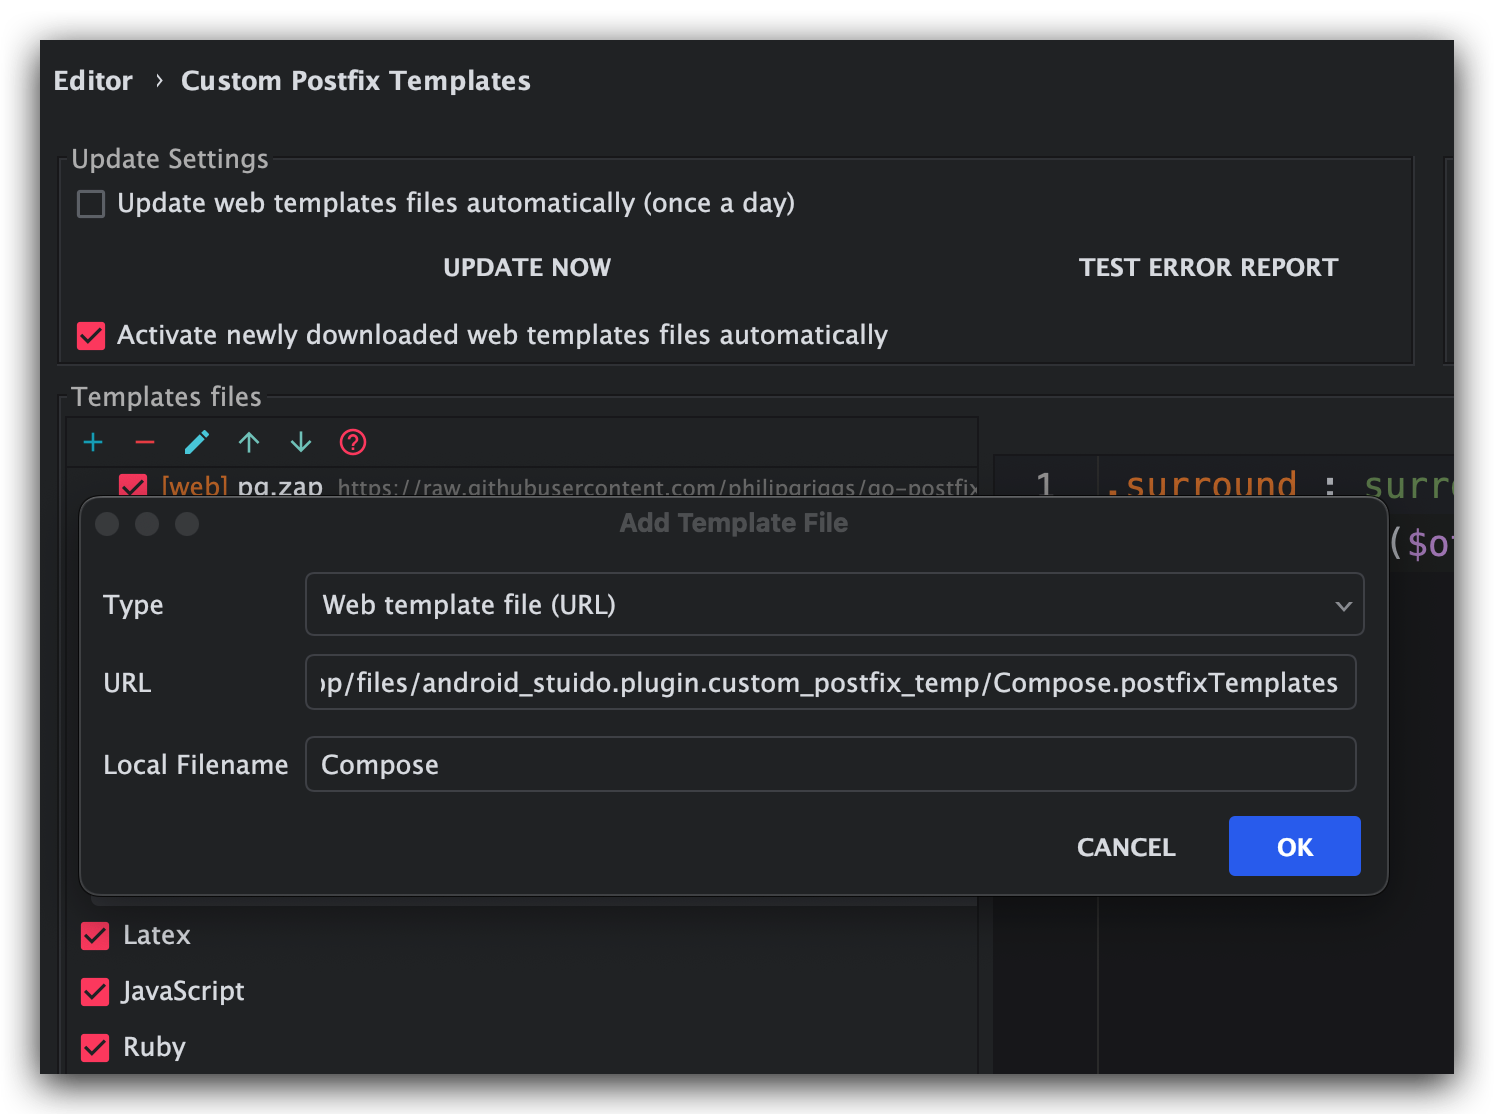
如下图所示,在 Custom Postfix Templates 设置中,点击 + 号按钮添加一个 Templates file 文件,语言选择 Kotlin,类型选择 Web template file,将下方的模板链接复制过去,并为文件提供命名即可。
以下按 Custom Postfix Templates 中 Kotlin 下的各个文件,列出我的自定义模板。
Compose
- .rem:转换成
remember { 原表达式 } - .remember:转换成
remember(keys) { 原表达式 } - .byval:转换成
val 变量名 by 原表达式,配合 .rem / .remember 使用 - .byvar:转换成
var 变量名 by 原表达式,配合 .rem / .remember 使用 - .mutableState:转换成
mutableStateOf(原表达式) - .byMutableState:转换成
var 变量名 by remember { mutableStateOf(原表达式) }
Common
- .surround:转换成
<光标位置> { 原表达式 }
DataStore
- .stringPref:转换成
stringPreferencesKey(原表达式)
- Title: 我的一些工作小技巧 (Mac系统)
- Author: Wavky
- Created at : 2025-03-11 21:16:06
- Updated at : 2025-06-16 19:17:16
- Link: https://wavky.top//MyTricks/
- License: All Rights Reserved © Wavky